Monday, January 13, 2014

Baby, it's (too) cold outside!

Like most of the midwest, last week we had temperatures that were incredibly cold.


(the little numbers at the bottom of the thermometer show that it had actually warmed up from -13 to -9 in the past few hours.)

But before the arctic weather hit, we first got a foot of snow. The combination made the roads here impossible to drive on. They were packed down with snow and ice that just couldn't melt because it never got warm enough. We were out of school for an entire week due to the weather.

What do you do when you have to stay inside for days on end? (because of course this snow came right after 2 weeks of no school due to Christmas break). Here are some of the things we did to stay busy:

1. Bring some snow inside to play with:


2. Make suncatchers with glue and food coloring (credit to this blog for the idea):


3. Bake a zillion different things (Becca's absolute favorite thing to do is bake). I only took pictures of one of the things we baked - pretzels. I have made homemade pretzels with the kids lots of time before, but we always start with frozen bread dough. Since I didn't have that on hand, and getting to the store was not a possibility, we made dough from scratch from a recipe I had cut out of a magazine years ago. I would not recommend this! The process took forever. Much much easier to start with ready made dough.

The picture below shows a combination of the article I had cut out, and a picture of Becca making the pretzels. A few differences I would like you to note:


a. Nowhere in the original article are the kids wearing as much flour as was necessary for making the actual dough.
b. In fact, there does not seem to be any mess at all in the picture on the right.
c. The kids on the right are using exactly one utensil to put the egg on the dough - a pastry brush. If you look closely at Becca, you will see she has out about a million different kitchen tools for this project including a candy thermometer, a zester, tongs, and a corkscrew. Why did it never occur to me that corkscrews and dough go hand in hand...oh that's right, because they don't.

4. Then when it finally got above 0, we went out to play for a bit:


Hope you are all staying warm where you are!


Tuesday, January 7, 2014

photo blocks

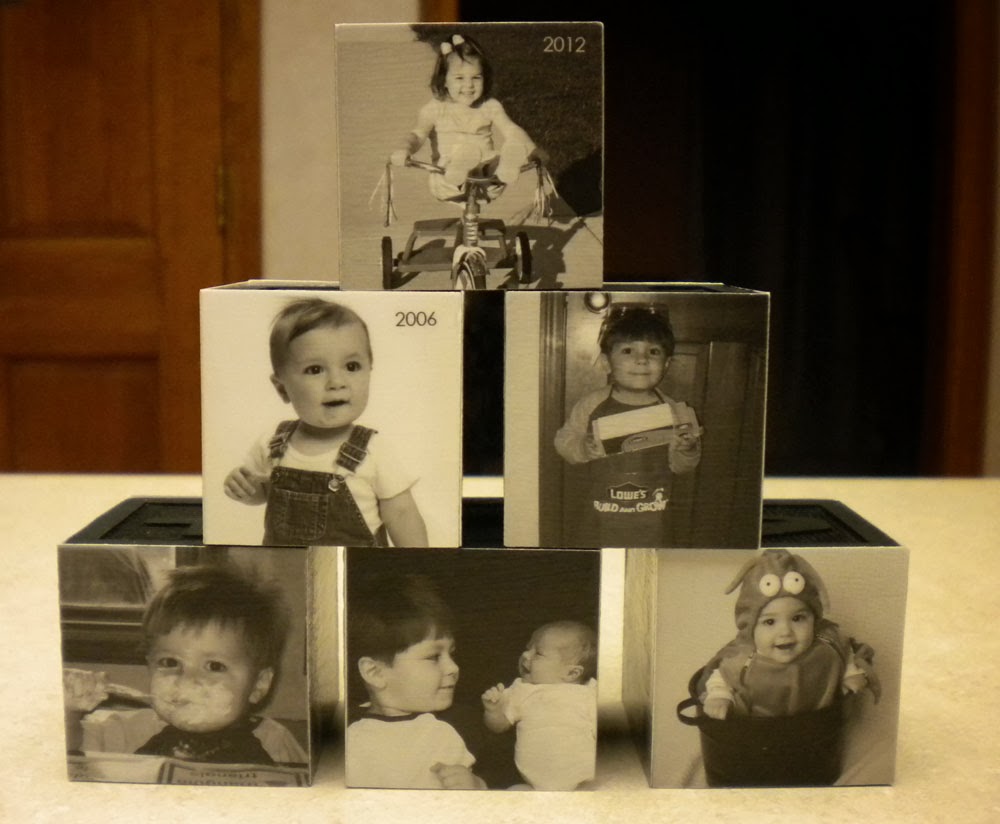
My fun crafty project this Christmas was to make photo blocks. It originally started when I saw a shutterfly catalog back in November that advertised their photo blocks. They were very cute, but were also $25 a pop. There was no way I was paying that much (because of course I wanted more than 1 block), so I set out to figure out how to make these for less.

I found some wooden blocks (just normal kids ABC building blocks) that were a good size to work with - 1.75" square (Entire set of 50 blocks bought on ebay for less than 1 shutterfly block. Score!)


I painted the top and bottom of each block with black paint. (random note about these: I left them on the counter for a day to dry thoroughly. Even though I was the one who painted these and I knew exactly what they were, every single time I saw them out of the corner of my eye, they looked like ice cream sandwiches or some other yummy treat. Squint your eyes, you'll see what I mean.)


While the paint was drying, I went through our old photos. My plan was to make one photo block for each year. I started with 2005 when Samuel was born, and made a block for each year all the way through 2013. I resized the photos on the computer to make them the perfect fit for the blocks. I also made all of the photos b/w for a consistent look. Each block holds 4 photos for the year, and I added the date to one of the photos. I tried to pick normal everyday life scenes, not necessarily school pictures or posed shots. 

I used mod podge to attach the photos to the blocks. Then, when they were dry, I sprayed them with a clear sealer to prevent discoloration and to keep them intact longer.


I love how these turned out. I took all 9 of them and put them in a glass bowl, which I am going to leave as a centerpiece/conversation piece on our dining room table. The kids love the blocks, too. They like to look back at when they were really little and see how much they have grown. 


As a variation to the photo blocks that will stay out year-round, I also made a set of Christmas ornament blocks. For most of these (except ironically the one shown below), I put only one picture for each year, so each block covers 4 years of christmas photos. I made 3 copies of each of these ornaments - one to display on our tree, and a copy each to put away for Samuel and Becca to have when they are grown up and have their own trees. They will each end up with about 4-5 ornaments total, since each block spans 4 years (assuming, of course, they still allow me to take funny pictures of them when they are older.) The ornament blocks were made the same way as the ones above, just with the addition of an eye hook and a ribbon for hanging. 


I made a total of 19 blocks this year (the 9 b/w ones above, 2 ornaments for grandparent gifts, and 8 christmas ornaments for us/the kids) all for about $25 (blocks on ebay, black paint, eye hooks, ribbon). I still have about 30 blocks left over as well. Moral of the story: much much cheaper than if I had bought these through shutterfly.

I had a lot of fun making these. So much in fact, that I am going to offer them as a new product on my etsy shop. If you know anyone who wants a photo block like these, feel free to send them my way!

Wednesday, January 1, 2014

Winter Fun

Here are some pictures of things we have been up to lately:

Making holiday treats (with lots and lots of sprinkles). Each Christmas Eve we bake cookies and bring them to our local fire station. The firefighters always let the kids check out the fire engines, which they love:


Having a surprise visit from Santa. Samuel asked to try on Santa's hat and Santa replied "Well, only if I can wear your hat!" 


We went to see The Nutcracker (disclaimer: it was the Max and Ruby version of The Nutcracker, designed for young kids, so it wasn't the real thing, but more of an introduction to what The Nutcracker is like.) You can only barely make it out in the picture below, but Becca insisted on packing a gift bag full of ribbon and wrapping paper scraps and bringing them with us to give to "a stranger at the nutcracker", as she said. (should I be concerned that she wants to give presents to strangers?) We gave it to one of the ushers who looked like a grandmother, and she was very nice about it. The performance was at a beautiful restored theater called The Embassy Theatre. You can kind of see some of it in the picture below (if you look past the part where it looks like Erin's head is on fire. Ushers are apparently good at accepting gift bags of ribbon, but not so good at taking pictures.)


Becca has been asking to try ice skating, so we went one afternoon with Aunt Erin and Uncle Mark to a local rink that has ice skating and also happens to have bounce houses. Both kids overwhelmingly preferred the bounce houses to the ice skating, and as you can see in the picture below, Samuel is not eager to get back on the ice any time soon. His feet kept hurting because instead of gliding them across the ice, he kept picking them up and taking tiny steps. Becca was a wild woman on the ice and it took me AND Erin to hold her up so that none of us fell. After about 2 times around the rink, she told us "I'm ready to go in the middle now. On my own." Um, I don't think so. She was so excited and wiggly, she could barely stand still on the ice without falling one way or the other. 


Happy New Year everyone! I will try to be better about posting on our blog in 2014!